
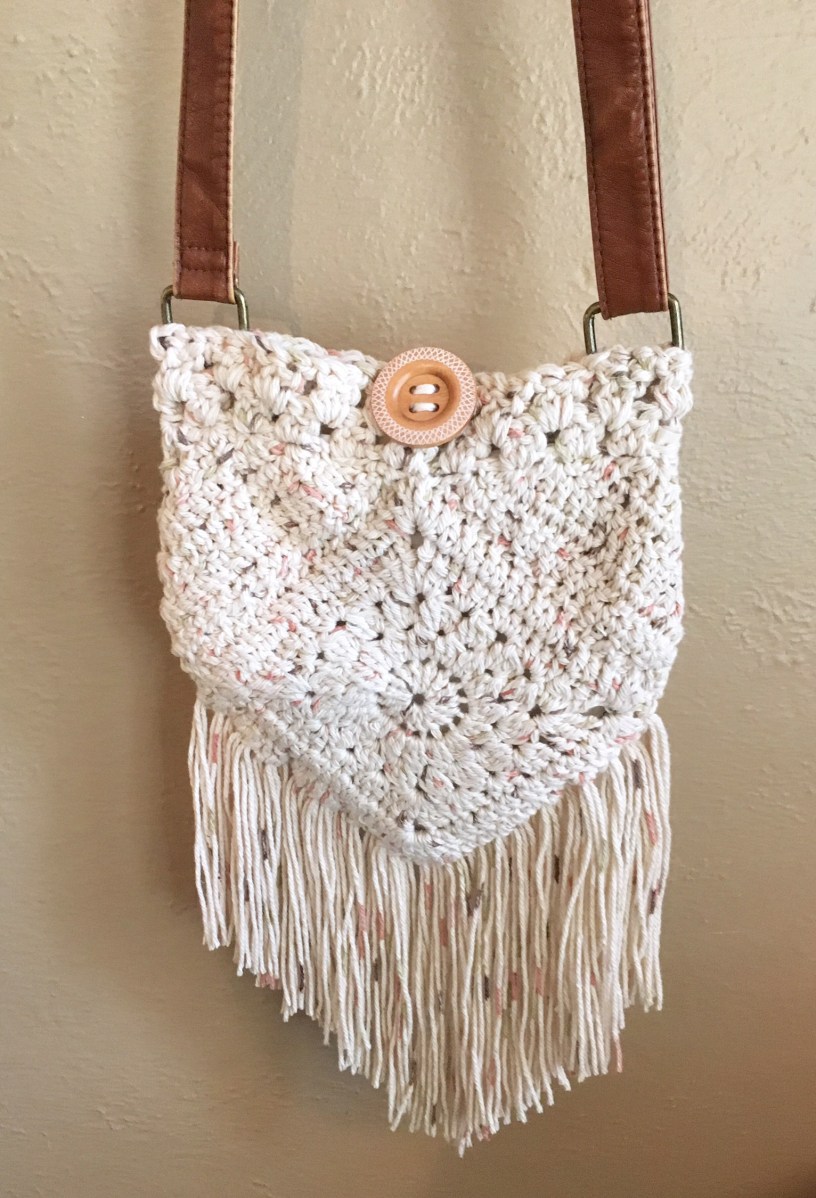
There is nothing like a deadline to give you a good kick in the pants. After last week’s WIP post I realized that I needed to get going on my projects (for the mere selfish fact that there are more projects I want to do). I therefore set to work on my boho bag (pattern from here). The fringe was easy, but still, I dragged my feet to add a liner. This purse can be made without one, but I felt it would be more secure (and I’d be more prone to use it) if I added one. Only problem was, I’m a little scared of my sewing machine. Hand sewing was an option, but it would take a lot more time. So, at about 6:30 last night, with nothing else to write about, I bit the bullet and got on my machine.
Making the liner took hardly any time at all. Plus, I had Little C next to me the whole time cheering me on, “Good job, Mom. You’re a really good sewer. Can I try next?” I hand sewed it into the bag, which admittedly looks a little sloppy, but it is secure and now I don’t have to worry about lipgloss and keys falling out.
I used a faux leather strap from an old purse, It worked out perfectly. And the button was from my collection. What do you think?


Hope everyone’s projects are getting completed! Happy Crocheting!

The fringe looks good! Glad you decided to add it. 🙂
LikeLiked by 2 people
Thanks! I think it was the right decision too😊.
LikeLiked by 1 person
Looks great!
LikeLiked by 2 people
Thank you!
LikeLiked by 1 person
I love it!
LikeLiked by 2 people
Thanks!
LikeLike
It looks lovely 🙂
LikeLiked by 1 person
Thanks!
LikeLike
Such a great Boho Bag, I love it!
LikeLiked by 2 people
Thank you! I love it too!
LikeLiked by 1 person
Oh totally love this !
LikeLiked by 1 person
Thanks, it turned out really great!
LikeLiked by 1 person
I like the fringe A LOT! Good job pulling out that machine….every seam gets easier!
LikeLiked by 1 person
Thanks! I think going with the fringe was a good idea. The sewing machine is getting easier, it doesn’t take me 2 hours to sew a straight line anymore!
LikeLiked by 1 person
That is definitely progress! We just need to find some seam for you to sew everyday, and before long you’ll be cruising along!
LikeLiked by 1 person
Yes, I need some practice projects!
LikeLiked by 1 person
How about a nine patch pillow that you and your daughter can make together?
LikeLiked by 1 person
What a great idea! Is there patterns out there for this or can we just wing it?
LikeLiked by 1 person
you can wing it, but here’s what I use with 4-H Cloverbuds: cut nine 6 inch squares out of fabrics of your choice, and lay them out in the design you like, 3x3x3.
Sew each row together using a 1/2 inch seam allowance. Do not press until all three rows are done. Take row 1 and 3 and press their seams the same direction. Put them back, and take the middle row and press its seams the opposite way. Now when you sew them the seams will nest together, and your corners will have a better chance of coming our square. Pin the rows together and sew 1/2 inch seams…press these new seams open. Now you have a pillow top! Measure a square 15 1/2 inches (or cut one to match your pillow top.) Put right sides together and pin. Sew around the edge using a. 1/2 in seam allowance, leaving a 2-3 inch gap in the center of one of the middle blocks. Cut triangles off of each corner (don’t cut your stitch line) and turn your pillow. Press, making sure you have the edges pulled out. Stuff the pillow and stitch the gap closed.
I wrote them out so its easier to help your daughter…you can concentrate on her instead of figuring out what to do next.😊 these are fun projects at any age, and you can do a couple for a room. All my 1st year kids do this project regardless of age. Let me know if something isn’t clear.
When I sew with 5-6 year olds, I put them on my lap and run the “gas.” I put my hands over theirs and gently help them steer until they get the hang of it, then I “go along for the ride.”
LikeLiked by 1 person
These instructions are great and will definitely make the project go more smoothly. Thank you so much for writing them out, I would have been lost and my kiddo would probably lose interest. Now we can just keep going! I’ll let you know how it goes!
LikeLiked by 1 person
Awesome, hope you two have great fun doing them!
LikeLiked by 1 person
I love it! Great idea reusing the straps!
LikeLiked by 1 person
Thanks!
LikeLike
That bag is amazing Brenna!! I want one! It looks like it would match with everything. Good for you and your daughter for sewing together:)!
LikeLiked by 1 person
Thanks Traci! I think I have a budding crafter on my hands!
LikeLike
I think it looks great. I love the feeling of completing a project!
LikeLiked by 1 person
Thank you, Meghan! It did feel good to finish this project. Now I can show it off!
LikeLiked by 1 person
Love this bag! The fringe really makes it
LikeLiked by 1 person
Thanks! And to think I questioned the fringe in the first place!
LikeLike
The bag is gorgeous!! I would have left the liner out – I’m scared of my sewing machine too – a needle going at 1000 mph so close to my fingers is bound to end up in an emergency room visit!! 😀
LikeLiked by 1 person
Thanks Tami! I thought about leaving the liner out for that same reason. Luckily everything was set up on my sewing machine so it went pretty quick 😀. I was more nervous about my daughter’s fingers than mine (she just had to see what I was doing) 😊.
LikeLiked by 1 person
How cute!
LikeLiked by 1 person
Thank you!
LikeLiked by 1 person